[data structure] linked list
linked list 정의
데이터를 일렬로 저장하는 자료 구조
각 노드는 값이 저장된 데이터와 다음 노드를 가르키는 포인터(참조)로 구성됨
linked list와 array의 차이
array | linked list | |
저장 방식 | 메모리 상에서 연속적으로 저장된다. | 메모리 상에서 각 노드가 흩어져 저장된다. |
접근 속도 | 인덱스로 빠르게 조회할 수 있다. | head 노드부터 순차적으로 탐색해야해서 느리다 |
삽입과 삭제 | 연속적으로 저장되어 있어서, 중간 요소 삽입하거나 삭제하면 많은 요소가 이동해야 해서 중간 삽입/삭제가 느리다. | 노드 포인터만 변경하면 되므로, 삽입과 삭제가 효율적이다. |
크기 조정 | 고정 크기로 선언되므로, 크기 조정하려면 새로운 배열을 만들어 데이터를 복사해야 한다. | 동적으로 크기 조정할 수 있어, 메모리 낭비가 적다. |
linked list 시간복잡도
| 의미 | 시간 복잡도 | |
| append | 맨 끝에 추가 | O(1) |
| prepend | 맨 앞에 추가 | O(1) |
| lookup | 조회 | O(n) |
| insert | 노드 찾아서 삽입 | O(n) |
| delete | 노드 찾아서 삭제 | O(n) |
singly linked list 구현
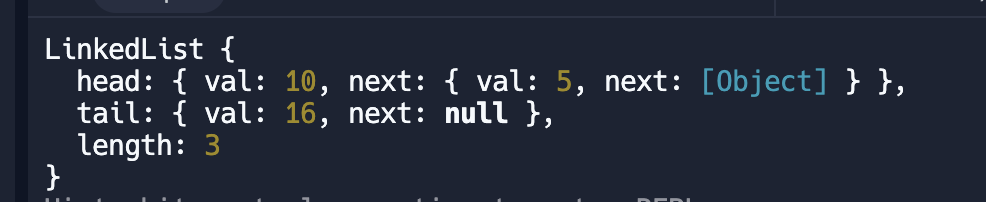
// 새로운 노드를 생성하기 위한 클래스
class Node {
  constructor(val) {
    this.val = val;
    this.next = null;
  }
}

// 링크드 리스트를 생성하기 위한 클래스
class LinkedList {
  constructor(val) {
    this.head = {
      val,
      next: null,
    };
    this.tail = this.head;
    this.length = 1;
  }

  append(val) {
    const newNode = new Node(val);
    this.tail.next = newNode;
    this.tail = newNode;
    this.length++;
    return this;
  }

  prepend(val) {
    const newNode = new Node(val);
    newNode.next = this.head;
    this.head = newNode;
    this.length++;
    return this;
  }

  printList() {
    const array = [];
    let currentNode = this.head;

    while (currentNode) {
      array.push(currentNode.val);
      currentNode = currentNode.next;
    }

    return array;
  }

  insert(index, value) {
    // index가 0인 경우
    if (index === 0) {
      return this.prepend(value);
    }

    // index가 링크드 리스트 길이보다 큰 경우
    if (index >= this.length) {
      return this.append(value);
    }

    // index가 링크드 리스트 index의 중앙인 경우
    // 삽입할 새로운 노드 만들기
    const newNode = new Node(value);
    // 삽입하고 싶은 위치의 앞 노드 찾기
    const targetNode = this.traverseToIndex(index - 1);
    newNode.next = targetNode.next;
    targetNode.next = newNode;
    this.length++;
  }

  // 전달받은 index 노드 찾기
  // 카운트랑 index가 같으면 타겟 노드 발견!
  traverseToIndex(index) {
    let currentNode = this.head;
    let count = 0;

    while (count !== index) {
      currentNode = currentNode.next;
      count++;
    }

    return currentNode;
  }

  remove(index) {
    if (index === 0) {
      this.head = this.head.next;
      this.length--;
    } else {
      const targetNode = this.traverseToIndex(index - 1);
      targetNode.next = targetNode.next.next;
      this.length--;
    }
    return this;
  }

  reverse() {
    // 노드가 헤드노드만 존재하는 경우는 리버스 적용하지 않고 바로 헤드노드 리턴함
    if (!this.head.next) return this.head;

    // 1 -> 10 -> 5

    // 첫 번째 노드, 두 번째 노드, 세 번쨰 노드를 지정
    let first = this.head;
    let second = this.head.next;

    // 역순할 두 번째 노드가 존재할 때만 reverse 실행
    while (second) {
      let third = second.next;
      // 10 -> 1
      // reverse 하기위해서 타겟 노드의 포인터 변경
      second.next = first;
      first = second;
      second = third;
    }

    // 초기 헤드노드가 테일 노드가 되었기 때문에, 헤드노드의 포인터도 초기화가 필요
    this.tail = this.head;
    this.head.next = null;
    this.head = first;

    return this.printList();
  }
}

let myLinkedList = new LinkedList(10);
myLinkedList.prepend(1);
myLinkedList.append(5);
myLinkedList.append(16);
myLinkedList.insert(2, 99);
myLinkedList.insert(0, 88);
myLinkedList.insert(20, 8800);
myLinkedList.remove(0);
doubly linked list 구현
이전 노드를 가리키는 prev 포인터가 포함되어서, 리스트를 양방향으로 탐색할 수 있다.
양방향 탐색이 가능하기 때문에, singly linked list보다 삽입, 삭제가 더 편리하다.
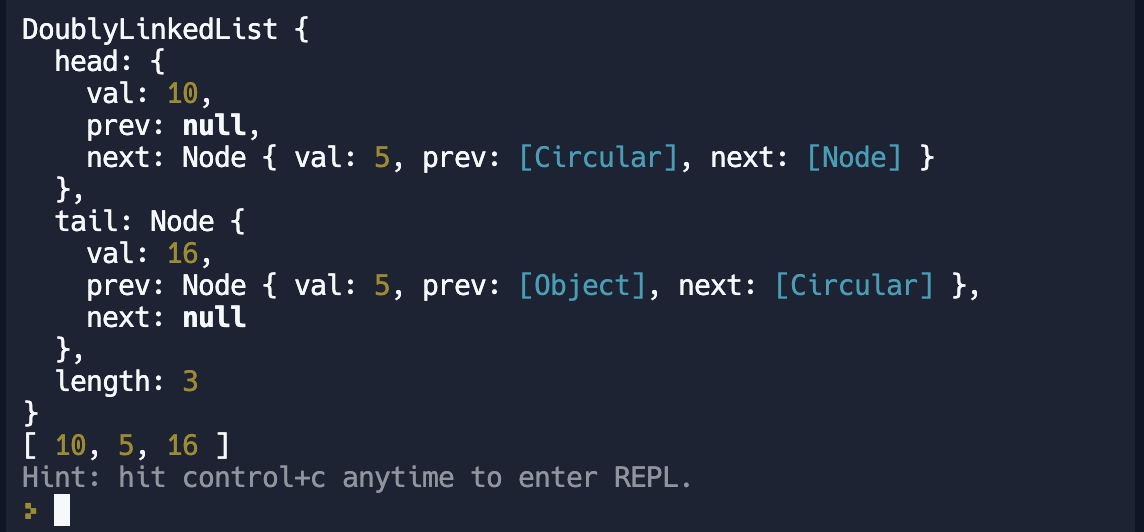
class Node {
  constructor(val) {
    this.val = val;
    this.prev = null;
    this.next = null;
  }
}

class DoublyLinkedList {
  constructor(val) {
    this.head = {
      val,
      prev: null,
      next: null,
    };
    this.tail = this.head;
    this.length = 1;
  }

  append(val) {
    const newNode = new Node(val);
    newNode.prev = this.tail;
    this.tail.next = newNode;
    this.tail = newNode;
    this.length++;
    return this;
  }

  prepend(val) {
    const newNode = new Node(val);
    newNode.next = this.head;
    this.head.prev = newNode;
    this.head = newNode;
    this.length++;
    return this;
  }

  printList() {
    const array = [];
    let currentNode = this.head;

    while (currentNode) {
      array.push(currentNode.val);
      currentNode = currentNode.next;
    }

    return array;
  }

  insert(index, value) {
    // index가 0인 경우
    if (index === 0) {
      return this.prepend(value);
    }

    // index가 링크드 리스트 길이보다 큰 경우
    if (index >= this.length) {
      return this.append(value);
    }

    // index가 링크드 리스트 index의 중앙인 경우
    // 삽입할 새로운 노드 만들기
    const newNode = new Node(value);

    // 삽입하고 싶은 위치의 앞 노드 찾기
    const targetNode = this.traverseToIndex(index - 1);
    newNode.next = targetNode.next;
    newNode.next.prev = newNode;
    targetNode.next = newNode;
    newNode.prev = targetNode;
    this.length++;
  }

  // 전달받은 index 노드 찾기
  // 전체 순회하기
  // 카운트랑 index가 같으면 타겟 노드 발견!
  traverseToIndex(index) {
    let currentNode = this.head;
    let count = 0;

    while (count !== index) {
      currentNode = currentNode.next;
      count++;
    }

    return currentNode;
  }

  remove(index) {
    if (index === 0) {
      this.head = this.head.next;
      this.length--;
    } else {
      const targetNode = this.traverseToIndex(index - 1);
      targetNode.next = targetNode.next.next;
      targetNode.next.prev = targetNode;
      this.length--;
    }

    return this;
  }
}

let myLinkedList = new DoublyLinkedList(10);
myLinkedList.append(5);
myLinkedList.append(16);
myLinkedList.prepend(1);
myLinkedList.insert(2, 99);